
Simple Pita Bread Recipe
This simple pita bread recipe is going up a couple of weeks earlier than I was originally expecting, but since I love pitas, why the heck not. In a recent pop-in visit with my aunt, I bragged about how much I loved making pitas at home after receiving a couple of tips from my chef brother. She had recently failed in her attempt (only 1 of 8 “bubbled”) and so I promised this recipe would go up as soon as I had a chance to write it.
Jump to RecipeThe secret to #homecooked pita
Pitas themselves are pretty straight forward from an ingredient perspective, but some recipes make them quite complicated. I have found that the key to good pitas is good yeast.
My simple pita recipe comes from a combination of about 5 different pita recipes that I combined together and whether you want to do all white or partial whole wheat flour is up to you. Apparently yeast likes to feed on whole wheat flour a little faster than it does on straight white, all-purpose flour, so after some tips from the pros, I start my yeast mix with whole wheat and white sugar.
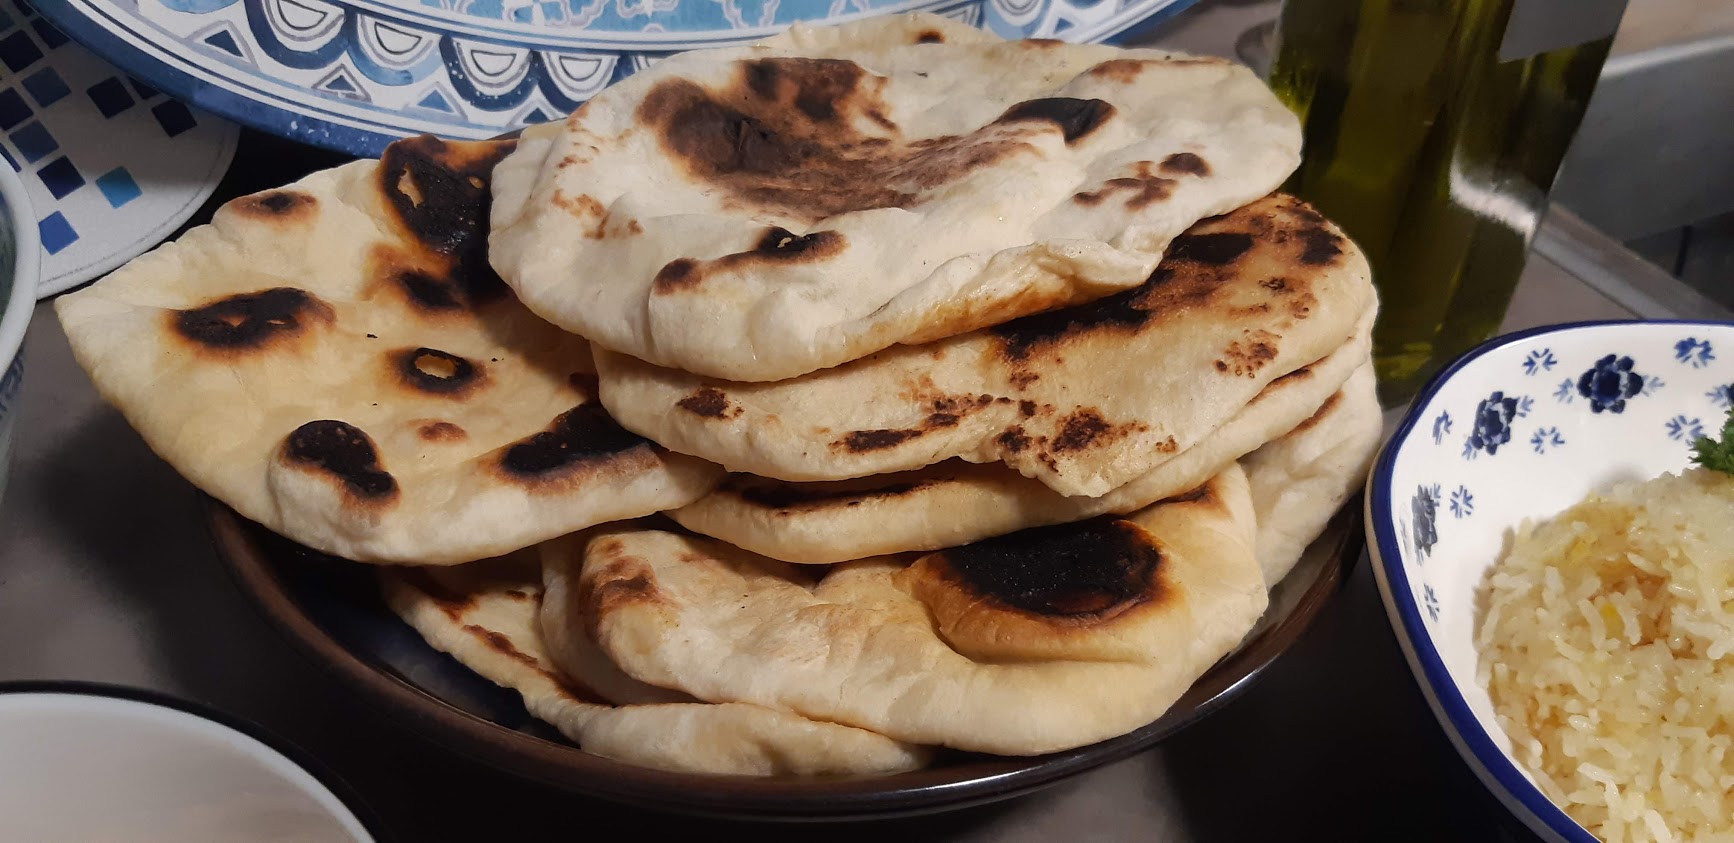
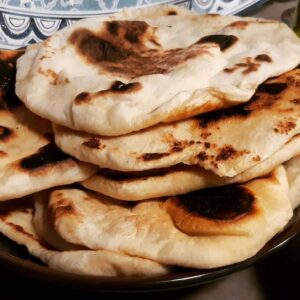
During my first ~3 pita trials, I had varying levels of salt, added or omitted olive oil, added sugar, took it out… but my favorite thing to see during the pita creation process is a nice puffy, soft pita rising in the oven or cast iron skillet.
Pitas are one of those funny things… they only take 15 minutes of prep, 5 minutes of rolling and then 5-10 min of cooking (where you just watch them look cool), but because they are so inexpensive to buy, it’s one of those add-ons that is under represented in the home kitchen.
Simple Pita Bread Recipe
Equipment
- Oven/baking sheet or cast-iron skillet
Ingredients
- 300 g all-purpose/white flour
- 35 g whole wheat flour
- 1 cup water
- 2 tsp dry active yeast
- 1 tsp white sugar for feeding yeast
- 2 tsp kosher salt
- 20 g white flour (reserve flour, for rolling)
Instructions
- In mixing bowl, add together sugar, yeast, water and whole wheat flour. Whisk and let sit 15 minutes. You will see some action start to happen, bubbles forming in mixture.
- Once yeast mix starts to bubble (15 min), add in all purpose white flour and salt.
- Mix with spoon, by hand or in kitchen mixer with dough hook.
- Let sit 2 hrs or so, until dough has visibly risen.
- Choose oven method or cast-iron skillet method. Preheat as directed below.
- In the meantime, cut dough into equal portions (should make 8-10 small/medium sized pitas)
- Form approximately round balls and roll out into thin, half-centimeter/ ⅛ -¼ inch thick.
Oven methodn (easier, less maintenance, quicker)
- Preheat oven to 450F with pan or stone in oven during preheating.
- In oven, add as many pita dough as possible without overlap and cook 4-5 minutes per round, reheating pan between rounds. Remove when top becomes nicely browned, but not crispy. If you prefer, do an optional flip after 2-3 minutes (halfway) or so and remove after total 4-5 minutes.
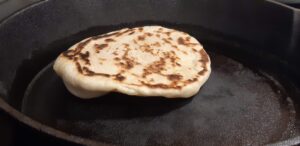
Cast-iron skillet method (the more fun way)
- Preheat clean cast iron skillet on stovetop.
- Similarly, with skillet method, add as many as comfortably fit on skillet pan without overlap (mine fits 1-2). In this method heat comes only from the bottom, so flip after 2-3 minutes once puffy pocket starts to form and repeat on second side.
Finish:
- Repeat until all uncooked dough is used up. Store in a covered bowl or plate until ready to eat!
Notes
If at first you don’t succeed, try again next time you’ll get it, I promise.
Which method is best?
Personally, I’m torn on what is better between oven and skillet. I love the simplicity of the oven, but as I mention in the notes above, I also really love the puff happening right in front of me on the skillet! Choose which works best for you and let me know your feedback!

Enjoy this simple pita bread recipe with your favorite Mediterranean #homecookedfeast!
Here are few things to try with your pita!
- Egyptian style bone-out sous-vide lamb leg
- Saffron Rice
- Cucumber pomagranate salad
- Grilled zucchini
- Handcrafted Tzatziki

Any family secrets? Any stories? Subscribe and follow on IG: @homecookedfeast give us a comment
Thanks for stopping in – we’re looking forward to hearing from you.
Enjoy food; enjoy life. – HCF